How to Take an Epic Paddling Photo in 7 Easy Steps
We all love pictures of ourselves paddling. A day or two after a race, most paddlers can likely be found scanning Facebook or Instagram for pictures of their team and hoping that they were captured in the awesome action shots. We are grateful for photographers like Ed Nguyen, Anne Zeng, Didi Fisher Weinreb, Jeff Holobushen, and many more who take fabulous pics at the regattas and share them online for us to see. And we all desperately hope there will be at least one epic shot where it looks like all our years of diligent training and all of our coach’s efforts have finally come together to be proudly displayed in the photographic evidence.

Being photographed is a strange thing, isn’t it? We typically don’t like the way we look in pictures, yet we still clamor to see ourselves in the shots. We always hold out hope that we look awesome, yet more often than not, we didn’t quite hit the mark that our mind had arbitrarily created. So, how can we guarantee an epic paddling photo? It’s easy. You just need 5 simple tools (6 if you like to play it safe):
- An OC1 or OC2 (though this can be done on a dragon boat or OC6 with modifications)
- A GoPro
- A paddle
- A GoPro Jaws Flex Clamp Mount
- A computer (I use a MacBook Air) with a video editing program
- A GoPro floaty – optional, but this will keep your GoPro from sinking if you accidentally drop it
(Although a PFD isn’t listed as one of the required items, you should always wear your PFD while paddling)
OK, let’s get started:
Step 1: Attach your GoPro (with the optional floaty) to the Jaws Flex Clamp Mount. Clamp the mount onto the front iaku of the OC with the GoPro hanging upside down. Angle the GoPro towards the seat of the OC, but position the GoPro close enough to the water that it will dip into the water when you are seated and paddling. I recommend using the bendy gooseneck part of the mount to bend it back a bit so that the GoPro is actually in front of the iaku. That way, you won’t hit it if you have a long reach. With a newer GoPro, you can use the screen to see where your camera is pointing. If you have an older GoPro like mine, you have to guess, but it generally turns out right.


If you are doing this on a dragon boat, you can use the same mount clamped to the side of the boat, though you would need an additional gooseneck so that it is long enough to reach down to the water level (you can buy two Jaws clamp mounts with the goosenecks and attach them to each other). It helps to either paddle in seat one, or have no one in the 2 seats in front of you. Leave enough room in front of you, otherwise you’ll be hitting the camera with every stroke.
Here is what it looks like on a dragon boat:

This would also work on an OC 6, though, like on a dragon boat, you would need an additional gooseneck to reach down to the water level. Attach it to one of the iakus and make sure you are sitting in a seat behind where it is attached.
Step 2: Make sure the GoPro is on video mode. Yes, I know we want still shots, but we will take video to get the still shots. If you use the time lapse setting, which takes a photo every 0.5, 1, 2, 10, 30, or 60 seconds, you might not get a photo at the exact second that you want, and depending on your stroke rate, you may end up having a ton of photos at the exact same point in your stroke, for example, always at the catch. So, for the best results, use video mode. You will then take screen shots of your video.
Step 3: Start paddling. Make sure to paddle on the left, unless you have a right-rigged ama, or are on the dragon boat. Basically, you want to paddle on the side where the camera is. Paddle somewhere between an “easy” and an “all out” – not too light, but not going crazy. Don’t worry that the camera dips down into the water. That is what creates the awesome shots with water surrounding you. The camera is likely to move a bit when the pressure of water hits it. If you notice that the camera has shifted too much, simply stop and put it back to where it was. The GoPro has a wide-angle lens, so you are likely to be in the shot no matter how much the camera shifts, though I have cut my entire head off a few times. See?

You’ve got the video, now what?
Step 4: Load the footage onto your computer. I am a Mac person, so I use iMovie and will explain how to do this in iMovie, but you can use a similar program on a PC.
Step 5: Once the footage is uploaded to iMovie, you can flip the entire video so that it is right-side up. First, select the clip, then near the top right make sure that “adjust” is selected. Then choose the third option that looks like the cropping tool. From there, select the button on the right that has the rectangle with an arrow, showing that you are flipping the video (it doesn’t matter which one, as long as you hit it twice).

Once it is flipped, you can look at it frame-by-frame to see where the best action shots were captured. Use the right arrow key to advance the video to the next frame. This can take a while, but it is actually fun to see what each frame looks like.
Step 6: When you find a frame that shows you looking fabulous, take a screen shot of it. On a Mac, use “shift,” “command” and “3”, on a PC use “PrintScreen” or “PrtSc”. Tip: I look for shots where the water has parted, but still looks like it is spraying up or doing something interesting. I also screen shot far more than what I actually need, but you never know what you will end up with, so I’d rather have too many than not enough. I end up discarding about 95% of what I’ve taken screen shots of, but it only takes one awesome shot to be that “epic shot”.
Here is a sequence of 12 screen shots. You can see exactly how many blurry water shots there are in comparison to how many useable shots. But again, it only takes one to be that “epic shot”. Can you tell which one I used?


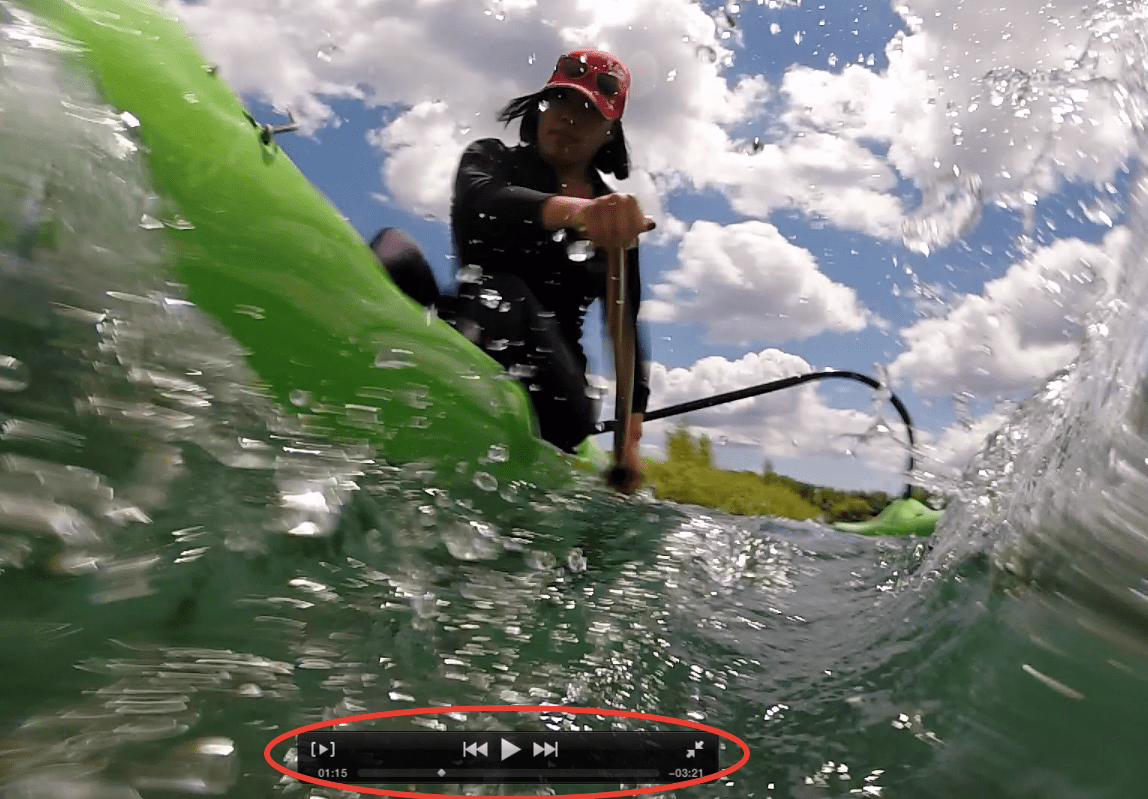
Be careful: When taking a screen shot, make sure your cursor is away from the control panel at the bottom (that has the play/pause button, among other things). Once you move the cursor away, the control panel will disappear after a few seconds, which will be better for your screen shots. If you forget, you will end up with screen shots that show the control panel, as seen below (oops!):
Step 7: Open the screen shot. If you have a Mac, it will open in Preview. If you didn’t flip your video already, use the rotation button (near the top right) to turn the photo 180 degrees. Then you can see exactly how awesome you look when you are right-side up. Now share your epic shot online with the paddling world!
A few pro tips:
1. Wear a bright, single-colored top without a lot of designs or logos on it.
2. Don’t wear sunglasses if you want to see your face. Sunglasses typically get splashed and then have water spots on them, which can look funky, especially when the sun hits them. When the camera dips into the water, it creates a splash zone (think of what happens when you dip the corner of your paddle into the water when the boat is going at full speed). This splash zone will end up on your glasses.
3. Smile! I’m not talking about a corny smile that looks like you were just told to say “cheese” by your Great-Aunt Velma. Instead, try a nice, pleasant smile that makes it look like you’re having a good time paddling. Sure, paddling can hurt, but you won’t likely be happy with a photo where your face looks strained like you are in pain. Try saying the letter “a” while making a half-smile. That is about the position you want your mouth to be in in order to look like you are having a great time paddling, otherwise you might end up grimacing or even sticking your tongue out without even knowing it.
4. Pay attention to where the sun is, but play around with it. Depending on the time of day, if the sun is in front of you, you will be highlighting yourself and will be nice and bright. If the sun is behind you, you will get more of a silhouette, which can also look really cool. I typically just paddle around and see what turns out.
5. The cleaner the water, the better the shot. If the water is brown or funky, it will look more like you were mud wrestling than paddling. So, find an area with fairly clean water to do this.
6. Play around with camera placement. When you are on the boat, you can stop and adjust the camera angle every so often to ensure that you have a variety of shots. There is a “happy medium” for camera placement, but you really have to play around with it. I have put it too high which means it never hits the water, and too low which means it hits the water too much and creates too many water spots on the camera. Recently, I sent some of my teammates out on my OC and used them as models to see what we could get. I gambled with the camera placement because I wasn’t on the boat and couldn’t see exactly how far the camera was dipping in the water, but overall we got some good results.
Here is an example of not putting the camera low enough. Although it did generate some splashes, there weren’t as many as I usually like to have:
Here is an example of angling the camera too low. I nearly cut her head off, but I got a lot of cool splashes:

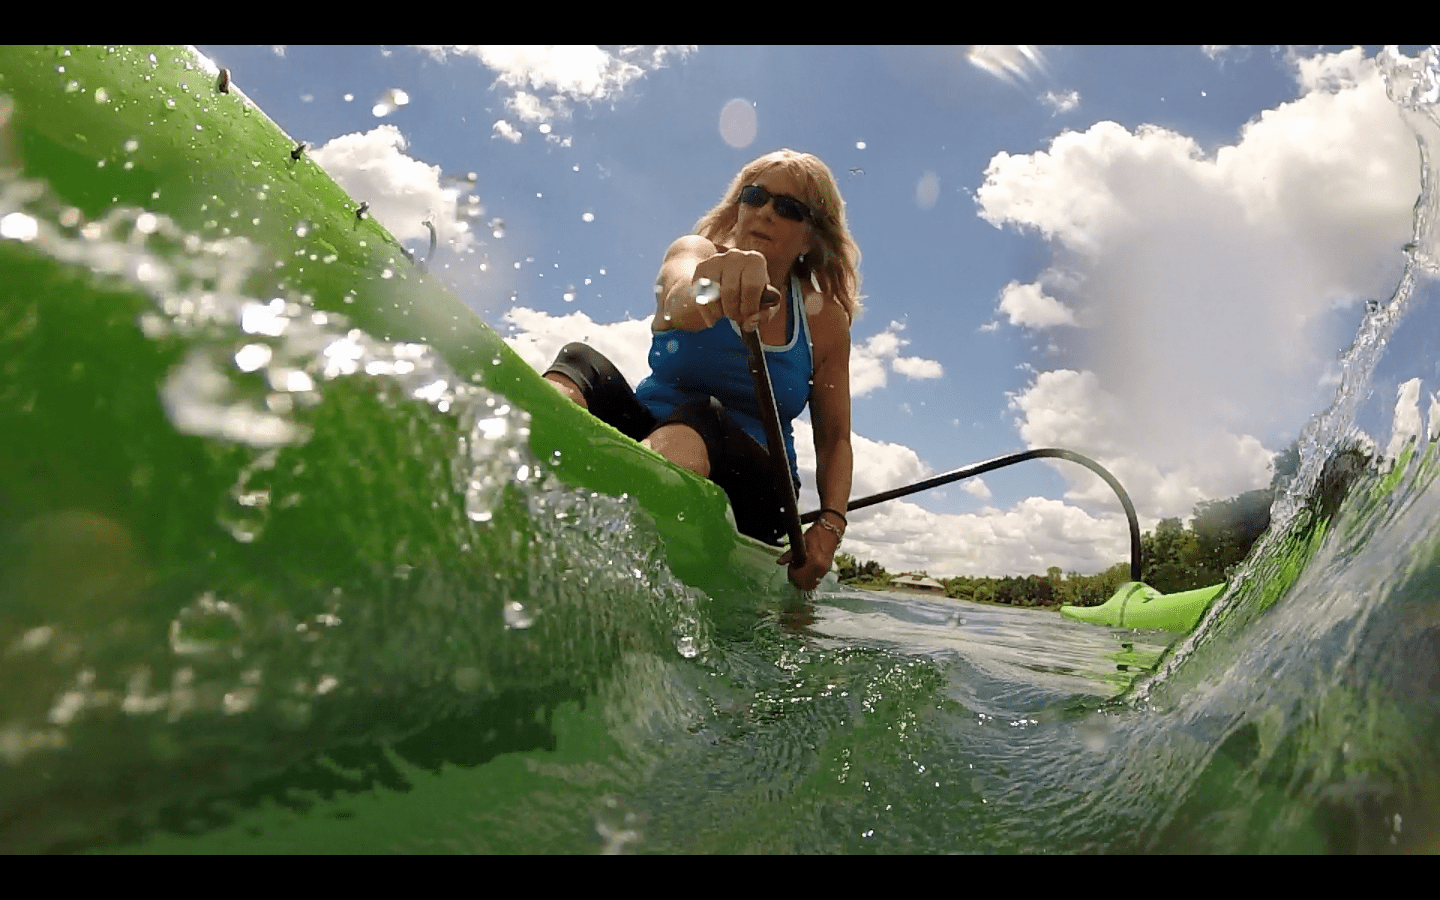
Here is an example of good placement of the camera, but notice what happens when you wear a hat; it puts your face in the shade unless the sun is directly in front of you, so I would recommend not wearing anything with a visor:

The following photo turned out quite well, but from all of the footage I shot with this teammate, a water spot randomly landed exactly in front of her face and managed to stay there nearly the entire time. I found several shots that would have been amazing based on the cool splashes, but her face was entirely blurred by the water spot (as you can see in the second photo). These things happen more often that you would like, but again, it only takes one frame to be the epic shot you are looking for. In this case, I think we got it!


I will admit that I didn’t come up with the idea of taking these photos myself. It was actually my brother’s creativity that inspired me. He attached my GoPro onto his canoe and hung it upside down so that it was in the water. He was curious what it would capture in the water. At first I told him it was just going to be a bunch of upside down footage. He replied, “So? Turn it around.” Genius. And that is what started it all. I’ve had so many paddling friends ask me how I got these photos that I finally decided I should write a blog about it and share it with everyone, especially since it is so easy!
I’d love to see what creative shots you come up with. Good luck and let me know if you have any questions!


I am a paddler and photographer so , this blog is important for me and I think very easy to understand too. I will definitely recommend it to everyone who is going for paddling and want to make a memory of it. The tips are technical but easy to get so you don`t have to worry about that!
Thanks for reading, Kelly, and for your kind comments. I’m glad to know that the tips are easy to understand.